How to Plop Hair: The Ultimate Guide to Perfect Curls

Cómo hacer plopping en el cabello: la guía definitiva para rizos perfectos

Si buscas una forma de lograr unos rizos impresionantes y definidos sin usar calor, el plopping podría ser la solución perfecta. Esta técnica es especialmente beneficiosa para personas con cabello rizado u ondulado, ya que realza el patrón natural de rizos y minimiza el encrespamiento. Aquí tienes una guía detallada para ayudarte a dominar el arte del plopping y lograr unos rizos preciosos y con volumen.

¿Qué es el plopping?

El plopping es un método de secado natural que consiste en envolver el cabello en una toalla o una tela especial, como una camiseta de algodón o una toalla de microfibra. Esta técnica define los rizos, reduce el frizz y evita que el cabello se apelmace.

Cómo hacer plopping en el cabello: la guía definitiva para rizos perfectos

¿Por qué deberías probar el plopping?

A continuación se presentan algunas razones por las que el plopping puede ser una maravillosa incorporación a tu rutina de cuidado del cabello:

  • Mejora la definición de los rizos: el plopping favorece el patrón natural de los rizos al permitir que el cabello se seque de una forma que fomenta la formación de rizos.

  • Reduce el frizz: al minimizar la fricción y evitar el secado plano, el plopping ayuda a reducir el frizz y los cabellos sueltos.

  • Acelera el tiempo de secado: la técnica de plopping absorbe el exceso de agua, lo que puede acelerar el proceso de secado y reducir la necesidad de usar calor para peinar.

Cómo hacer plopping en el cabello: guía paso a paso

Sigue estos sencillos pasos para peinar tu cabello de manera efectiva:

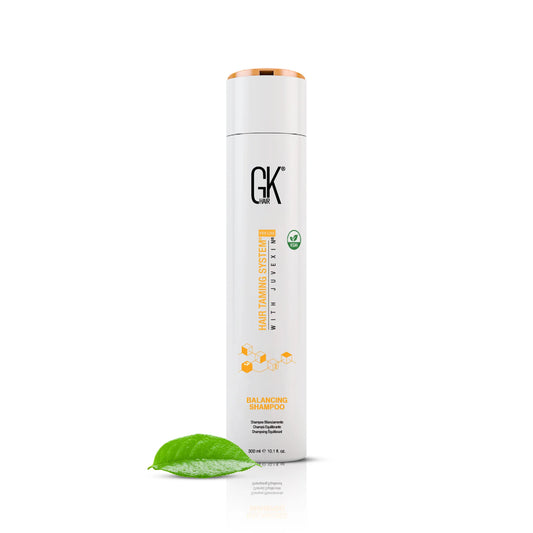
  1. Lava y acondiciona tu cabello: Comienza lavando tu cabello con un champú sin sulfatos, como el Champú Equilibrante para el Cabello GK. Continúa con un acondicionador hidratante, como el Acondicionador Hidratante para el Cabello GK, para mantener tus rizos hidratados.

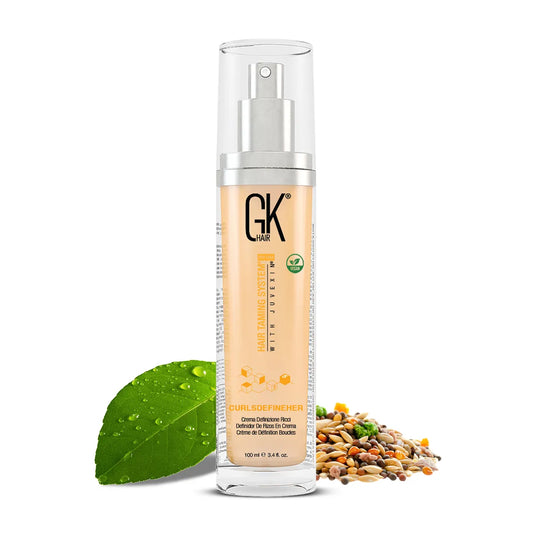
  2. Aplica productos de peinado: Con el cabello aún húmedo, aplica tus productos favoritos para realzar los rizos. Para mayor hidratación y definición, considera usar la Crema Definidora de Rizos GK Hair. Distribuye el producto uniformemente por el cabello con los dedos o un peine de dientes anchos.

  3. Prepara tu paño para plopping: Elige una camiseta de algodón o una toalla de microfibra para plopping. Estos materiales son más suaves con los rizos que las toallas de baño tradicionales y ayudan a reducir el frizz. Extiende la camiseta o toalla sobre una superficie plana, como una cama o una silla.

  4. Gira y coloca: Inclínate suavemente y gira tu cabello hacia el centro de la camiseta o toalla, asegurándote de que tus rizos estén centrados y desenredados.

  5. Envuelve y asegura: Reúne los bordes de la camiseta o toalla alrededor de tu cabeza y sujétala por detrás. La tela debe quedar ajustada, pero no demasiado apretada, para que los rizos se mantengan en su lugar y se sequen naturalmente.

  6. Esperar y secar: Mantén el cabello en la posición de secado durante 20-30 minutos o hasta que alcance el nivel de sequedad deseado. Puedes dejarlo actuar más tiempo si lo deseas, especialmente para acelerar el proceso de secado.

  7. Desenrolla y peina: Retira con cuidado la camiseta o toalla del cabello y separa los rizos con los dedos. Evita usar un cepillo, ya que puede desbaratar el patrón de los rizos y crear frizz. Para más volumen, puedes usar un difusor en un secador o dejar que el cabello se seque al aire por completo.

Consejos para un plopping perfecto

  • Evita el exceso de producto: Usar demasiado puede apelmazar tus rizos. Aplica una cantidad moderada de producto de peinado y añade más si es necesario.

  • Cuidado: Trata tus rizos con delicadeza para evitar que se quiebren y se encrespen. Aplica y retira el paño con suavidad.

  • Personaliza tu tipo de cabello: Ajusta el tiempo de secado según tu tipo de cabello y la definición de rizo deseada. El cabello más grueso puede requerir tiempos de secado más largos que el cabello más fino.

Productos recomendados para unos rizos bonitos

Para lograr los mejores resultados con el plopping, considere incorporar estos productos de GK Hair:

Cómo hacer plopping en el cabello: la guía definitiva para rizos perfectos
  • Crema definidora de rizos GK Hair: ayuda a mejorar la definición de los rizos y controlar el frizz.

  • Acondicionador sin enjuague GK Hair: proporciona hidratación adicional y ayuda a desenredar los rizos antes de aplicarlos.

  • Champú y acondicionador hidratantes para el cabello GK: garantiza que tus rizos estén bien hidratados y listos para peinar.

Conclusión

El plopping es una técnica fantástica para conseguir rizos bien definidos y sin frizz sin necesidad de calor. Siguiendo estos pasos y usando los productos adecuados, podrás disfrutar de unos rizos preciosos, sanos y llenos de vida. Para más consejos de cuidado capilar y recomendaciones de productos, visita el blog de GK Hair y explora nuestra gama completa de productos premium para el cuidado capilar .

¿Lista para probar el plopping? ¡Reconoce tus rizos naturales y deja que brillen!
Frequently Asked Questions

What is the plopping method for hair? 

The plopping method is a heat-free hair drying technique for curly or wavy hair. After applying styling products to wet hair, you flip hair over a soft cloth, wrap it around the head, and leave it for 20-60 minutes. The cloth absorbs excess water while holding curls in place so curls are flatter by the time they are dry, which in turn limits the frizz caused by gravity, air exposure, and towel friction.

How long should you plop hair? 

20 to 60 minutes is the standard plopping time. This varies by curl type. Wavy or fine hair dries faster, so a plopping time of 10-15 minutes is usually long enough. Thick or tightly coiled curls often benefit from the full 60 minutes or a little longer. The problem is not over-plopping, but rather over-wrapping. Wrapping for too long can actually cause frizz from too much contact with the fabric, and for some curl types it can actually flatten the roots. A good rule of thumb is to start with 20 minutes and adjust from there.

Can you use a regular towel to plop hair?

No, it is not recommended. Regular towels have a rough and looped texture, which is what causes frizz in the first place. 100% cotton T-shirts or microfiber towels are much softer on the cuticle while still effectively absorbing water. Material choice is the key reason plopping works as well as it does.

Should you apply products before or after plopping?

Always before. While hair is still wet, apply leave-in conditioner, curl cream, or other styling products, then plop. The cloth holds curls in shape while products work and water is absorbed. Applying product after plopping means the curls have already started drying without any support. In practice, this means that curls are far less likely to have definition by the end.

Does plopping damage hair? 

No, when done properly, plopping is one of the gentlest drying methods around. It eliminates heat, reduces friction, and minimizes physical manipulation which can lead to breakage when done on wet hair. The main things to watch out for is wrapping the hair too tightly and leaving the cloth on for too long, both of which can have an adverse effect on curl pattern or moisture levels at the scalp.

How to Plop Your Hair: Step-by-Step Guide

The plopping method looks a little awkward the first time, which is pretty much universal. Once you do it twice, learning how to plop hair becomes a walk through. Here's how:

Step 1: Wash and Condition Hair 

Use a sulfate-free moisturizing shampoo and conditioner to prep curls for styling without weighing them down. We recommend using our Moisturizing Duo. This dual-action color-protecting, hydrating Shampoo and Conditioner transforms your dry, brittle hair — leaving it soft, weightless, and damage-free.

Step 2: Apply Curl or Styling Products 

Apply curl or styling products while hair is still wet. Use a wide-tooth comb or your fingers to apply the product evenly from the ends of hair all the way up to the roots. Work product gently, as you do not want to create frizz.

Step 3: Wrapping 

Prepare the plopping cloth by laying a microfiber towel or cotton T-shirt flat over a bed or chair, with the hem closest to you. These materials are far less abrasive against the cuticle than standard bath towels, which is exactly the point.-shirt flat over a bed or chair, with the hem closest to you. These materials are far less abrasive against the cuticle than standard bath towels, which is exactly the point.

Step 4: Flip and Plop 

Flip hair over the head and lean forward. Gravity will make the hair fall naturally into the center of the cloth. The trick here is to let curls fall without pulling or scrunching. The curls should pile up on the T-shirt or microfiber cloth.

Step 5: Wrap and Secure 

Wrap cloth edges up around the head and tie or tuck in place at the nape of the neck. This should feel very snug, but uncomfortable. You are not compressing anything, just holding the curls in place.

Step 6: Wait 20 to 30 Minutes 

The rule of thumb here is 20 minutes for wavy hair, 30 minutes for curly hair. If curls are fine or loose, the above timings can often be cut in half with no problem. For thick, coarse or tightly coiled hair, it often makes sense to use the full 30 minutes or a little more to make sure curls have a chance to fully dry and set.

Step 7: Unwrap and Style 

Remove the cloth and gently separate curls with fingers. Do not use a brush. At this stage, hair can either be air-dried completely or finish off with a diffuser on a low heat setting for extra volume. Add a finishing product like a nourishing oil, if needed.